GitHub remains one of the most reliable repository website for code, but we can also utilize its storage capability to host images for our website. The easiest way is simply to upload/push image files to your GitHub repo and get the link from the web. But beyond manual upload, we always prefer elegant ways.
In this tutorial, we will use a image upload tool called PicGo. Then we are going to set up a custom domain for the GitHub repo to enable the pretty link for our images, e.g.: https://pic.fizzy.cc/img/somepicture.png (I will also use it as a demonstration in the following text).
PicGo currently supports 8 image hosting providers, some of them are professional Object Storage Service (OSS) providers. We will only focus on how to set up on GitHub for now.
Note: PicGo is only available in Chinese now, but after the setup you won’t need to use the interface anymore.
1 GitHub Settings
1.1 Create A New GitHub Repo
First, you need to create a new GitHub Repo as the host. Name the repo whatever you like. Make sure the repo is public otherwise the images cannot be access by your website or anyone else. Tick the box to create a default README.md file for the repo.

1.2 Create an Access Token
Click your avatar at the top right corner, go to Settings -> Developer Settings -> Personal access tokens, or simply click here. Then click the “Generate new token” button.
Write a Note the reference for yourself and ONLY select repo in the scopes.

Go to the bottom of the page, click the green “Generate token”. Copy the token now and paste it somewhere else or you will not be able to access to it. The token is the key that PicGo will use to access your repo later. Do not give the token to others!

1.3 Set Up Custom Domain
1.3.1 GitHub Repo Settings
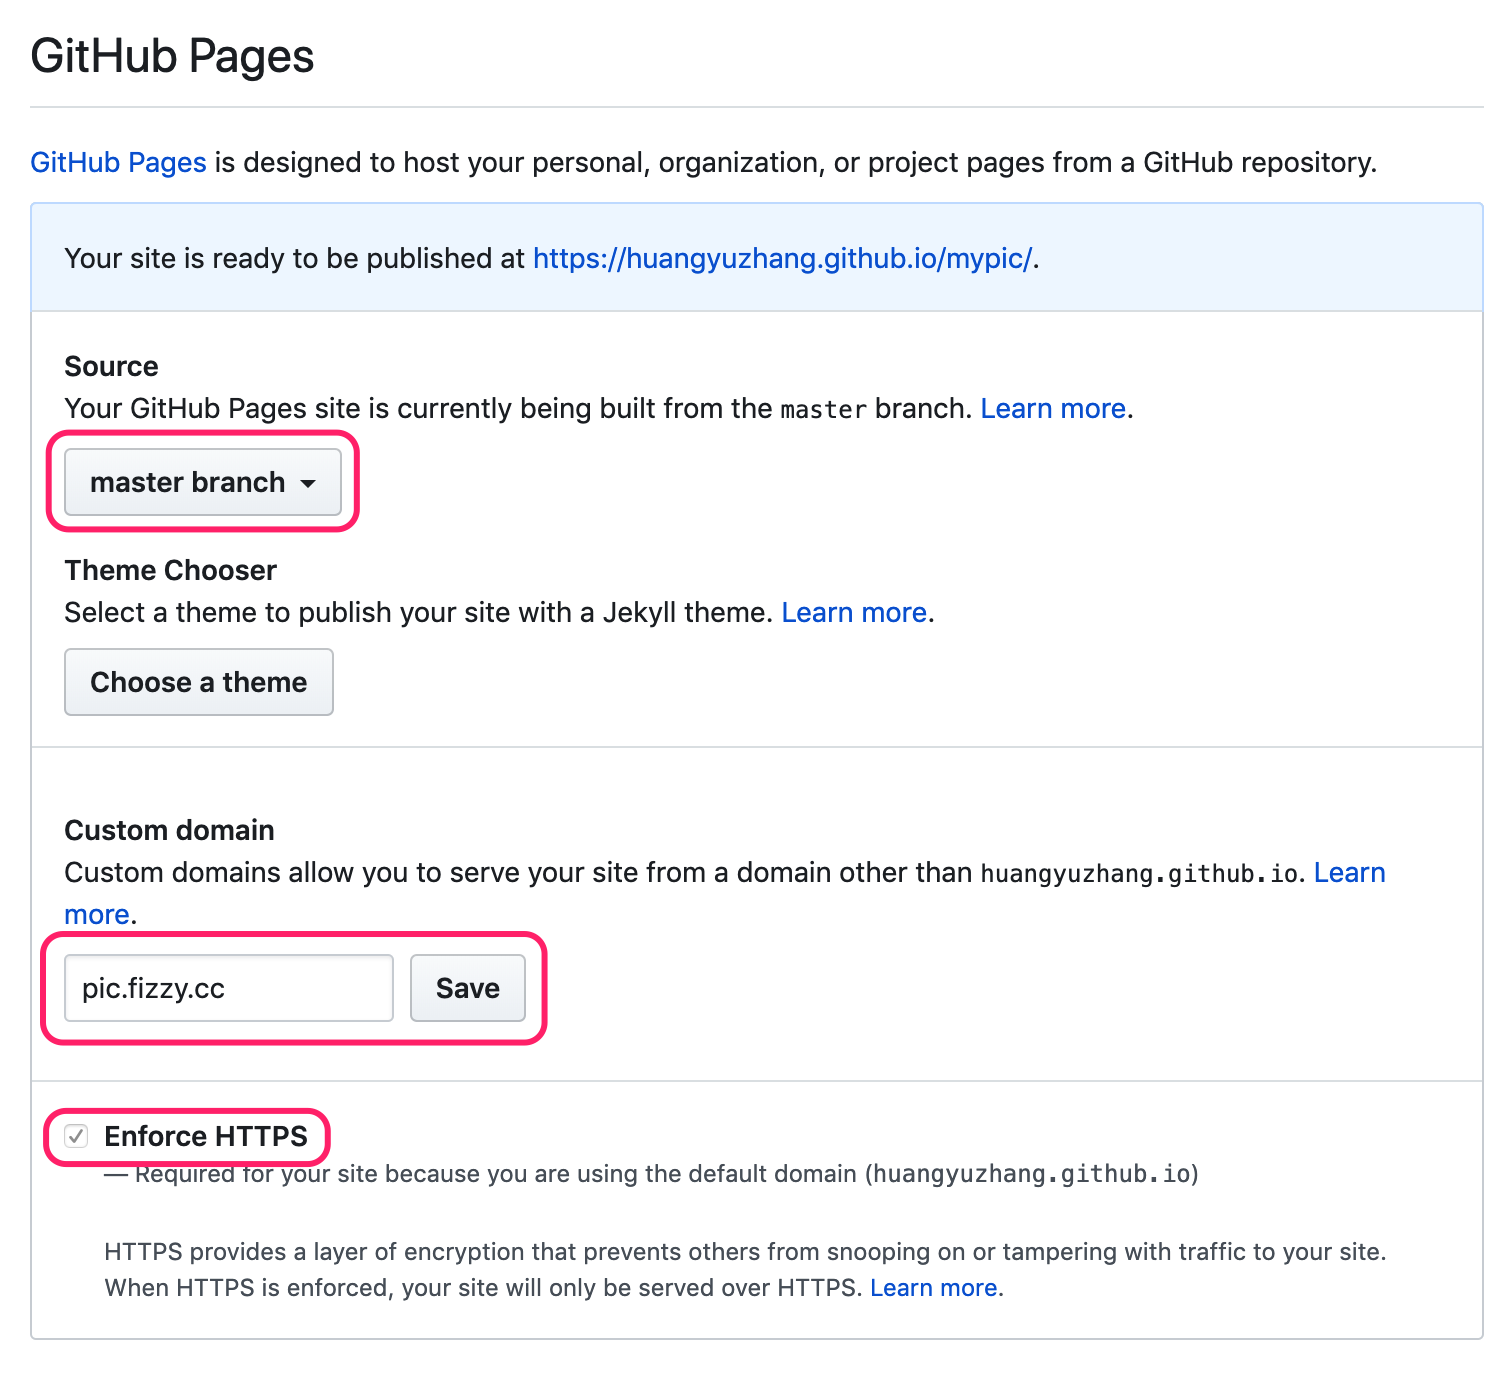
Now direct to the Settings of your repo created before. Scroll down and find the GitHub Pages setting.

Select the master branch as the source of the page. Then the page will refresh.

Scroll down and type in the custom domain name you want for the repo, recommend to use a secondary domain (e.g. pic.fizzy.cc). Then click “Save”, the page will refresh again.
Now if you scroll down you will see a notification tells you that your site is ready with the custom domain you set, and there is a CNAME file within your repo. Do not delete it.
Do not close the page for now.
1.3.2 Update DNS of Domain
Now go to your domain registrar or DNS service prodiver, create a CNAME record for your domain. The host is what you specified earlier (e.g. pic), the value is YOUR-GITHUB_ACCOUNT.github.io (e.g. myname.github.io).
The DNS settings may take few minutes to be effective. You can try ping with the domain to see if it has the same ip as your github.io domain’s ip. If you refresh the setting page you will probably see:

Don’t be panic, just wait for the DNS settings to take effect. After that, refresh the GitHub Pages settings page, click the “Enforce HTTPS” if a certificate has been issued already.

Now we have finished all settings in the GitHub.
2 PicGO Settings
2.1 Download PicGo
Go to the release page of PicGo to download the latest version for your computer, it supports MacOS, Windows and Linux.
Right click the PicGo icon and Open the window, then set up as below:


2.2 Set Shortcut Keys
By default the shortcut key for upload is control or command + shift + P. You can customize it at:

Now you can select some images in your folder or copy a image to your clipboard, then use the shortcut key to automatically upload them to your GitHub repo. Then you can click the PicGo icon and click the latest image to copy the image url in markdown format. Paste it to anywhere in your blog editor.
Notice
GitHub is a good place to host all your regular blog images. However, there is a storage limitation of rach repository on GitHub. If your website stores images more than 1GB, you might want to consider other alternatives rather than using this method. Read more here.
If you have any question please feel free to ask in the comment section below.
